
- Total
꿈꾸는리버리
[iCloudKit 시리즈 4] 나도 백엔드 있다 - iCloud Noti 알아보기 본문
🌷 iCloud 시리즈 목차
4) 여러 에러나 마주했던 문제 상황들 ...
🌷iCloud로 Notification 보내기
1️⃣ iCloud, Notification 활성화
이 내용은 다음 포스팅 참고하기
[iCloudKit] 나도 백엔드 있다 시리즈 3 - Coredate -> iCloud로 변경하기
🌷 iCloud 시리즈 목차 1) iCloud 세팅과 개념 그리고 유저 연결하기2.1) iCloud CRUD 해보기2.2) 이미지, 비디오, 오디오 CRUD하기3) Coredate -> iCloud로 변경하기3) iCloud Noti 알아보기4) 여러 에러나 마주했
rriver2.tistory.com

2️⃣ Notification 허용 알림 보내기
Notification의 기본 개념은 아래 포스팅을 참고하고
[SwiftUI] Notification 구현하기 - x시간 후, 특정일자에, 특정 지역에서
오늘은 iOS에서 local Notification를 띄우는 방법에 대한 공부를 했다.그동안 어려울 거라고 생각하고 미루고만 있었는데, 해보니까 생각보다 안 어렵더라구요..? 조금은 허무한 감이 있어서 과거에
rriver2.tistory.com
위 포스팅에서 추가된 registerForRemoteNotifications() 을 통해 Apple 푸시 알림 서비스를 통해 원격 알림을 받도록 등록한다.
추가적으로 이미 노티 설정을 거절한 유저 같은 경우에는 Cherish 설정으로 넘어가서 noti를 재설정할 수 있도록 안내해줬다.

    func requestNotificationPermissions() {
        // 일반적인 노티 보내기
        let options: UNAuthorizationOptions = [.alert, .sound, .badge]
        UNUserNotificationCenter.current().requestAuthorization(options: options) { success, error in
            if let error {
                print("ERROR", error)
            } else if success {
                print("Notification permissions success!")
                // Apple Push Notification service와 연결
                DispatchQueue.main.async {
                    UIApplication.shared.registerForRemoteNotifications()
                }
            } else {
                print("Notification permissions failure.")
                // 연결 꺼져 있는 경우에 설정으로 넘어가서 알림을 on으로 바꿀 수 있도록
                DispatchQueue.main.async {
                    if let url = URL(string: UIApplication.openSettingsURLString) {
                        UIApplication.shared.open(url)
                    }
                }
            }
        }
    }
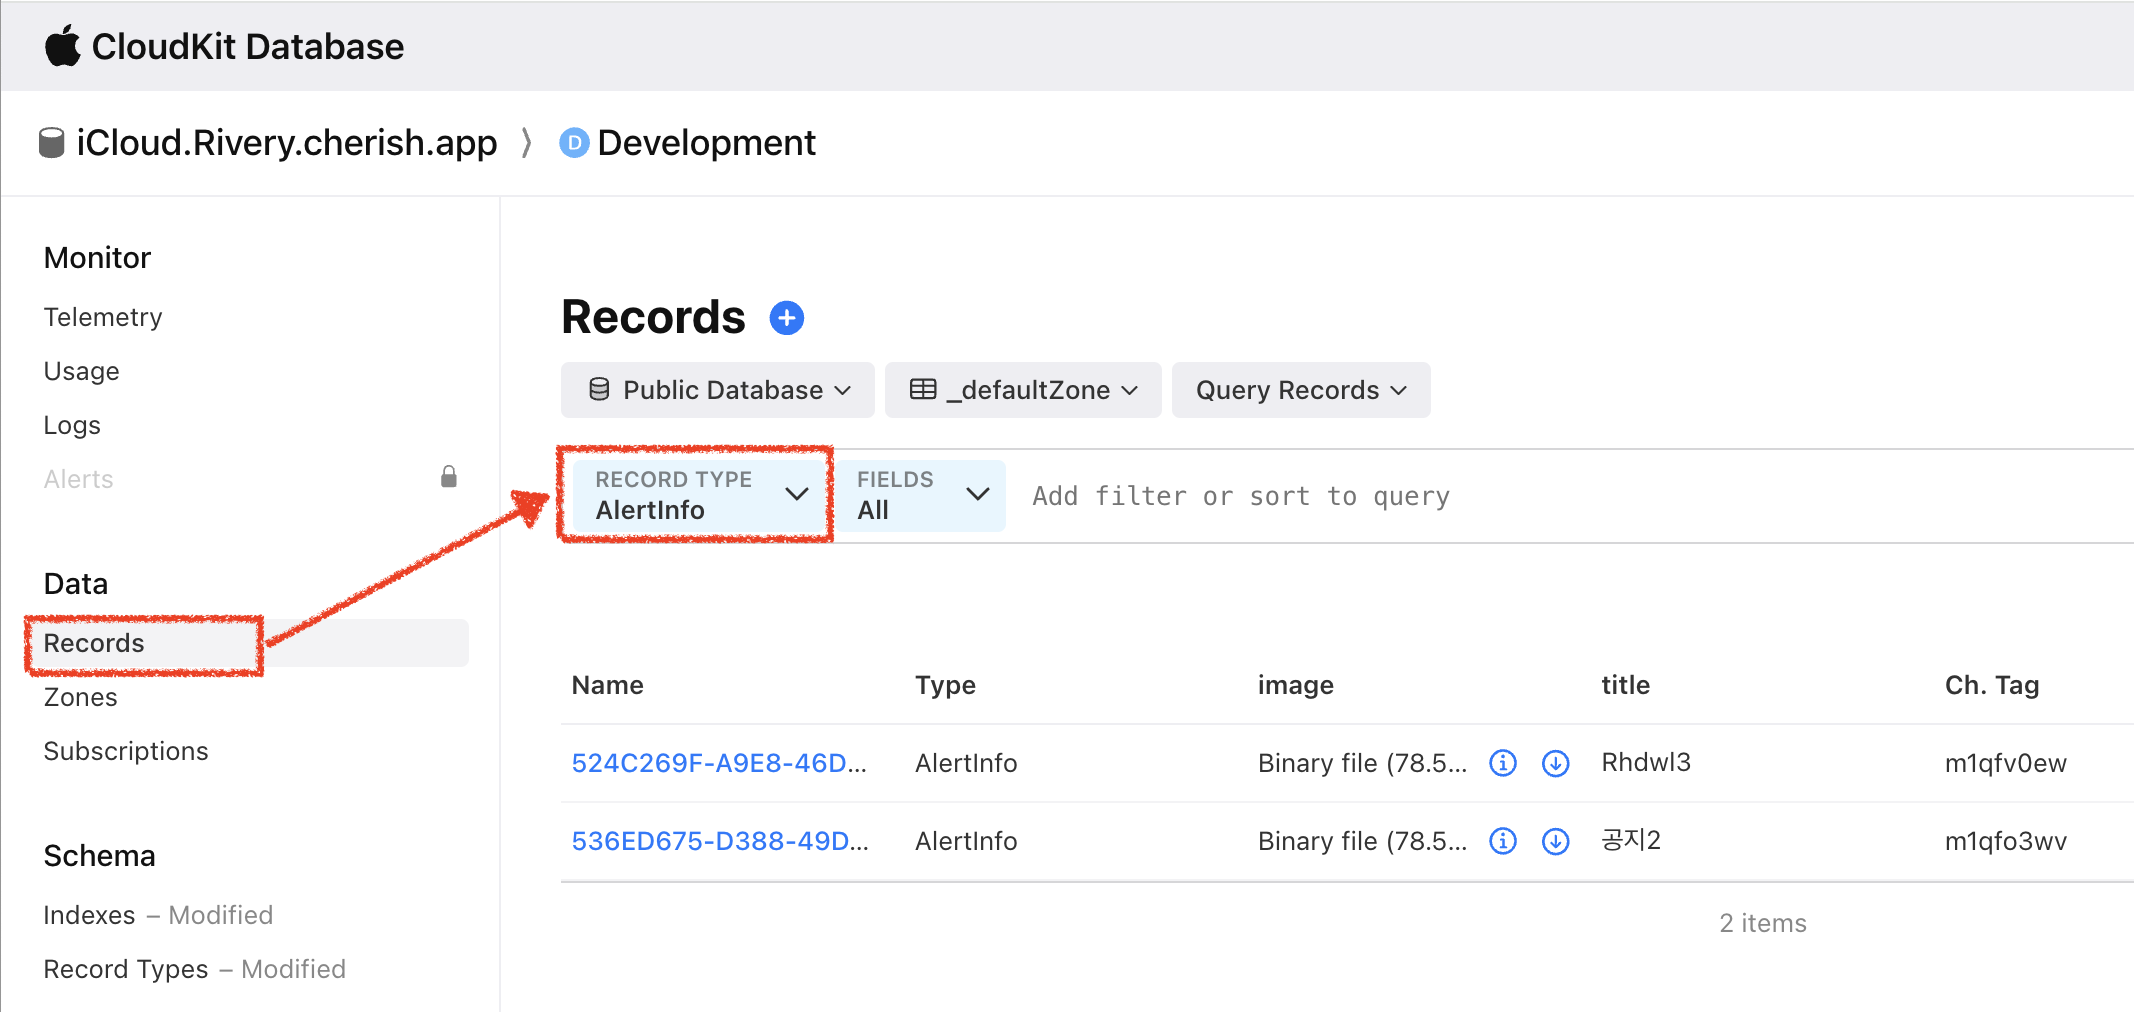
3️⃣ Record Subsctibe하기
나 같은 경우는 AlertInfo라는 Record에 새로운 record가 추가될 때마다 알림이 뜨도록 설정했다.
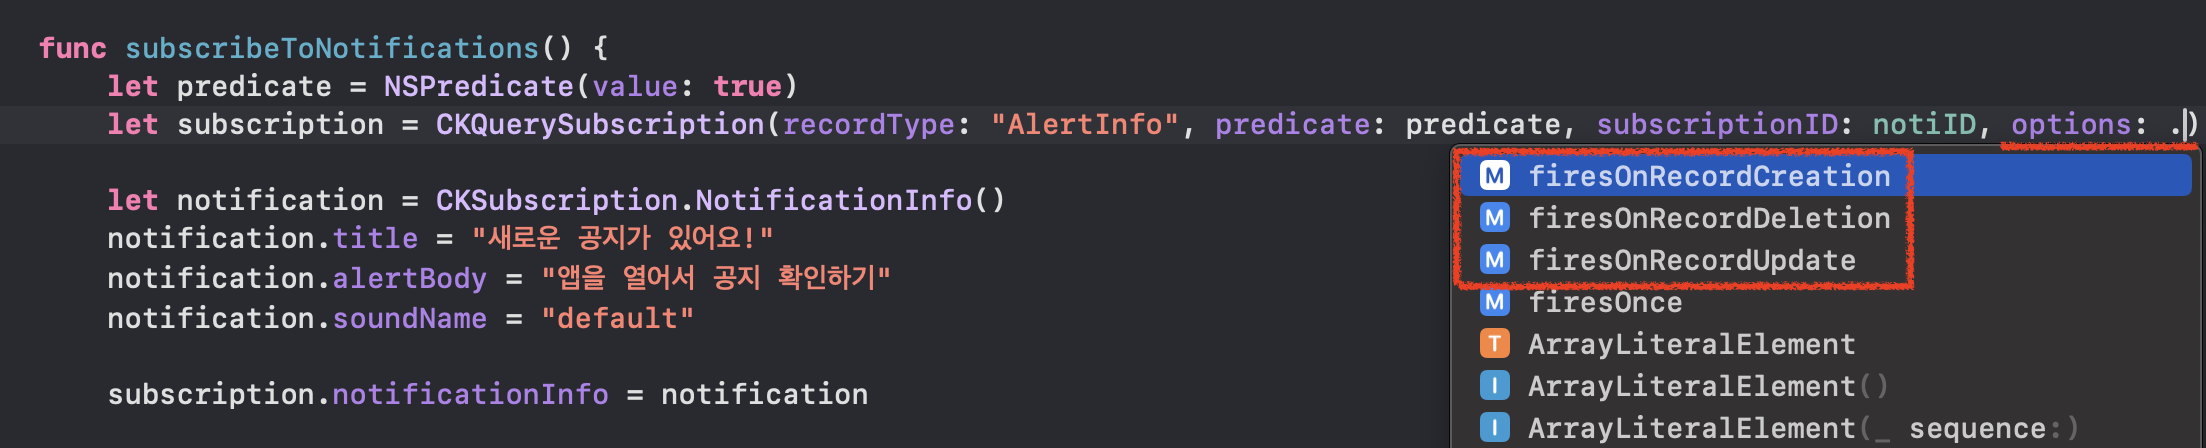
predicate를 설정하면 예를 들어 <title이 "5"로 시작하면 noti가 가도록 설정>과 같은 제약 사항을 넣을 수 있다.
그리고 subscriptionID는 설정한 noti의 id 값을 정한 것으로 나 같은 경우는 "alert_added_to_database"이라고 했다. 이는 나중에 subscriptionID로 접근해서 noti 정보를 수정하거나 삭제하는데 사용될 수 있다.

    func subscribeToNotifications() {
        let predicate = NSPredicate(value: true)
        let subscription = CKQuerySubscription(recordType: "AlertInfo", predicate: predicate, subscriptionID: notiID, options: .firesOnRecordCreation)

        let notification = CKSubscription.NotificationInfo()
        notification.title = "새로운 공지가 있어요!"
        notification.alertBody = "앱을 열어서 공지 확인하기"
        notification.soundName = "default"

        subscription.notificationInfo = notification

        CKContainer.default().publicCloudDatabase.save(subscription) { returnedSubscription, returnedError in
            if let error = returnedError {
                print("ERROR", error)
            } else {
                print("Successfully subscribed to notifications!")
            }
        }
    }
여기 Options의 내용을 바꾸면 해당 Record가 수정, 삭제, 생성될 때마다 알림이 뜨도록 설정할 수 있다.
4️⃣ Record Unsubsctibe하기
CKContainer.default().publicCloudDatabase.fetchAllSubscription를 활용하면 지금 노티로 설정된 모든 id 값을 불러올 수 있다. 이 중에 선택해서 notiID를 넣어도 된다.
    func unSubscribeToNotifications() {
        // 유저가 가지고 있는 모든 노티 id 불러오기
        //        CKContainer.default().publicCloudDatabase.fetchAllSubscriptions { <#[CKSubscription]?#>, <#(any Error)?#> in
        //            <#code#>
        //        }
        CKContainer.default().publicCloudDatabase.delete(withSubscriptionID: notiID) { returnedID, returnedError in
            if let error = returnedError {
                print("ERROR", error)
            } else {
                print("Successfully unsubscribe!")
            }
        }
    }
5️⃣ 테스트하기
우선 시뮬레이터에서는 노티를 확인할 수 없더라구욧...?
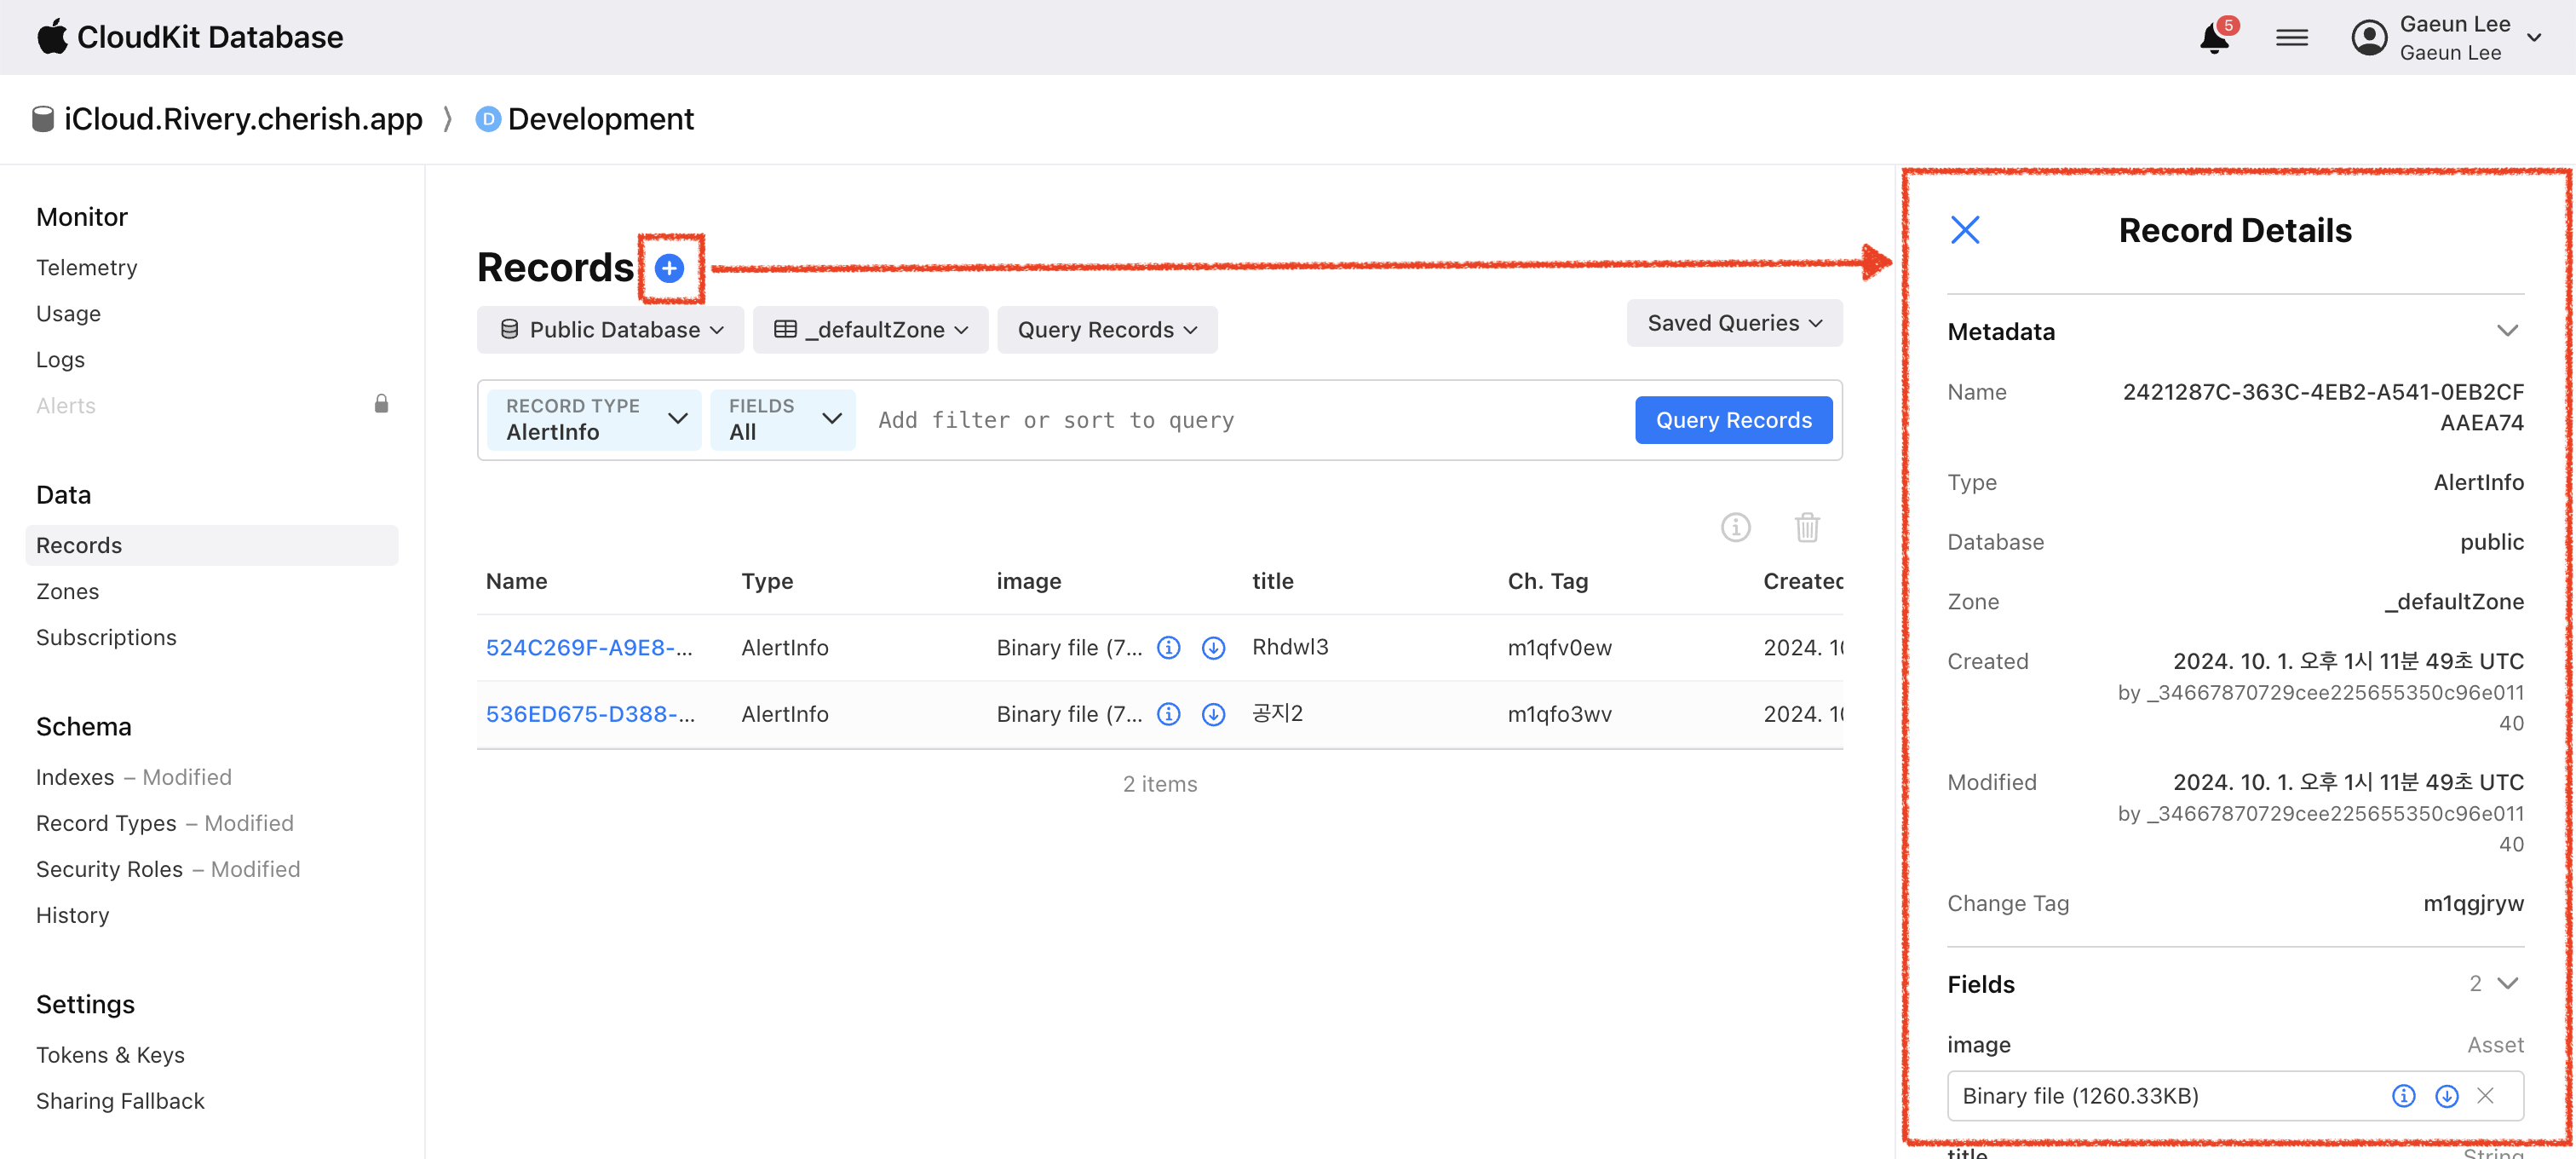
첫번째 방법은 시뮬레이터에서 새로운 Record 만들고, 실기기에서 확인하기
두번째 방법은 iCloud 사이트에서 새로운 Record 만들고, 실기기에서 확인하기
로그인 - Apple
idmsa.apple.com
이렇게,,, Notification 보내는 것까지 구현을 완료했습니다! Noti는 저는 사람들한테 앱 내 공지할 때 사용하려구요!! 아주 좋아요 굿굿 입니닷!
🌷 전체 코드
import SwiftUI
import CloudKit

class CloudKitNotificationViewModel: ObservableObject {
    let notiID = "alert_added_to_database"

    func requestNotificationPermissions() {
        // 일반적인 노티 보내기
        let options: UNAuthorizationOptions = [.alert, .sound, .badge]
        UNUserNotificationCenter.current().requestAuthorization(options: options) { success, error in
            if let error {
                print("ERROR", error)
            } else if success {
                print("Notification permissions success!")
                // Apple Push Notification service와 연결
                DispatchQueue.main.async {
                    UIApplication.shared.registerForRemoteNotifications()
                }
            } else {
                print("Notification permissions failure.")
                // 연결 꺼져 있는 경우에 설정으로 넘어가서 알림을 on으로 바꿀 수 있도록
                DispatchQueue.main.async {
                    if let url = URL(string: UIApplication.openSettingsURLString) {
                        UIApplication.shared.open(url)
                    }
                }
            }
        }
    }

    func subscribeToNotifications() {
        let predicate = NSPredicate(value: true)
        let subscription = CKQuerySubscription(recordType: "AlertInfo", predicate: predicate, subscriptionID: notiID, options: .firesOnRecordCreation)

        let notification = CKSubscription.NotificationInfo()
        notification.title = "새로운 공지가 있어요!"
        notification.alertBody = "앱을 열어서 공지 확인하기"
        notification.soundName = "default"

        subscription.notificationInfo = notification

        CKContainer.default().publicCloudDatabase.save(subscription) { returnedSubscription, returnedError in
            if let error = returnedError {
                print("ERROR", error)
            } else {
                print("Successfully subscribed to notifications!")
            }
        }
    }

    func unSubscribeToNotifications() {
        // 유저가 가지고 있는 모든 노티 id 불러오기
        //        CKContainer.default().publicCloudDatabase.fetchAllSubscriptions { <#[CKSubscription]?#>, <#(any Error)?#> in
        //            <#code#>
        //        }
        CKContainer.default().publicCloudDatabase.delete(withSubscriptionID: notiID) { returnedID, returnedError in
            if let error = returnedError {
                print("ERROR", error)
            } else {
                print("Successfully unsubscribe!")
            }
        }
    }
}

struct CloudKitNotificationView: View {
    @StateObject private var vm = CloudKitNotificationViewModel()
    var body: some View {
        VStack(spacing: 40) {

            Button("Request notification permissions") {
                vm.requestNotificationPermissions()
            }

            Button("Subscribe to notifications") {
                vm.subscribeToNotifications()
            }

            Button("UnSubscribe to notifications") {
                vm.unSubscribeToNotifications()
            }
        }
    }
}

#Preview {
    CloudKitNotificationView()
}
🌷 출처
https://developer.apple.com/documentation/cloudkit/ckdatabasenotification
CKDatabaseNotification | Apple Developer Documentation
A notification that triggers when the contents of a database change.
developer.apple.com
'오뚝이 개발자 > SwiftUI' 카테고리의 다른 글
| [인앱 결제하기 4] 구독 결제 구현하기 (7) | 2024.10.20 |
|---|---|
| [Error] SPM 설치 중 체크박스가 누락 -> 수동 삭제하기 (4) | 2024.10.04 |
| [iCloudKit 시리즈 3] 나도 백엔드 있다 - Coredata -> iCloud로 변경하기 (0) | 2024.10.01 |
| [iCloudKit 시리즈 2.2] 나도 백엔드 있다 - 이미지, 비디오, 오디오 CRUD하기 (0) | 2024.10.01 |
| [iCloudKit 시리즈 2.1] 나도 백엔드 있다 - iCloud CRUD 해보기 (1) | 2024.09.27 |


